- Minimum Players
- 10
- Maximum Players
- 10
- Forge Canvas
- Awash (H2A)
- Supported Infection Gametypes
-
- Linear Infection
- Custom Gametype Name
- Parasite x21
Aground Map Showcase
Created by: Auxi Klutch
Gametype: Parasite x21
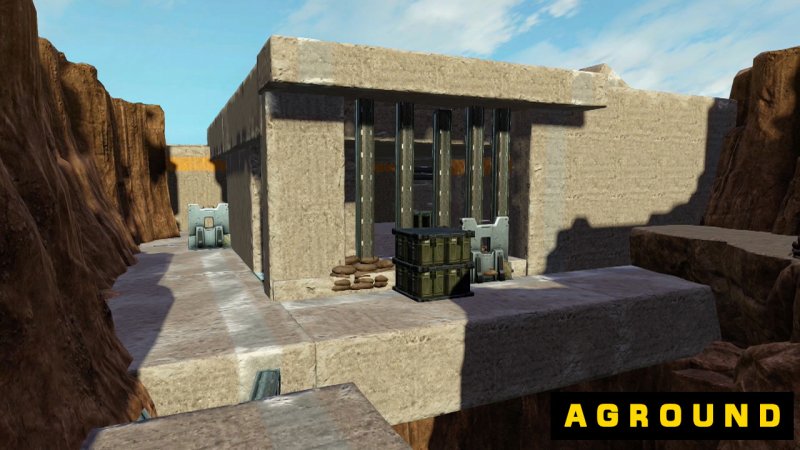
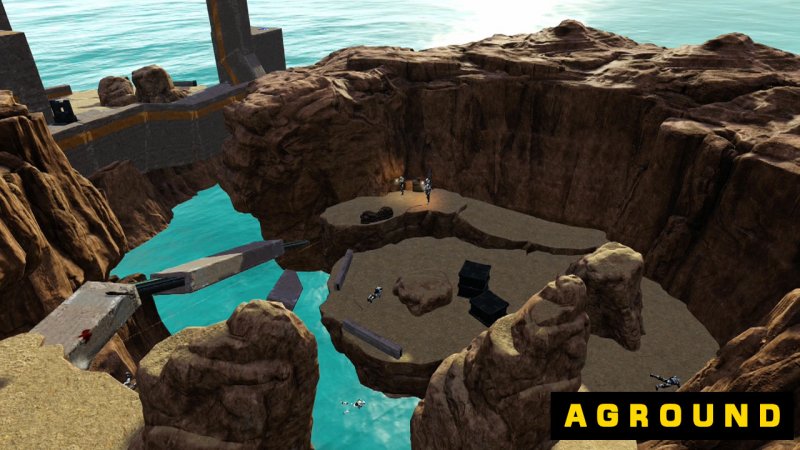
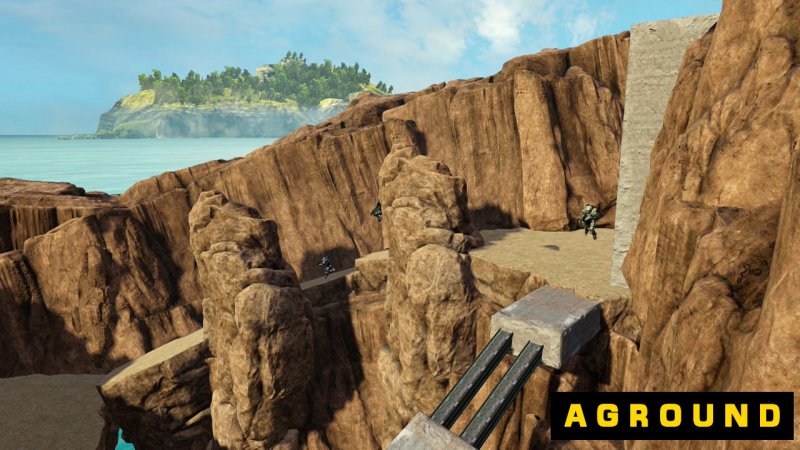
Aground is a Halo 2 Anniversary Linear infection map shown on the canvas of Awash. This spectacle of map is home to jaw dropping aesthetics as you and your team of survivors make their way through the coastal ridgeline. The aesthetics don’t end there as you also move past a decommissioned UNSC recon outpost, then through a small defensive cave to ensure protection for the small base of operations located atop the ridge. Lastly, with the remaining survivors in your force, you make your last efforts to survive in a broken down cove.
Now, some quick facts you need to know about the map.
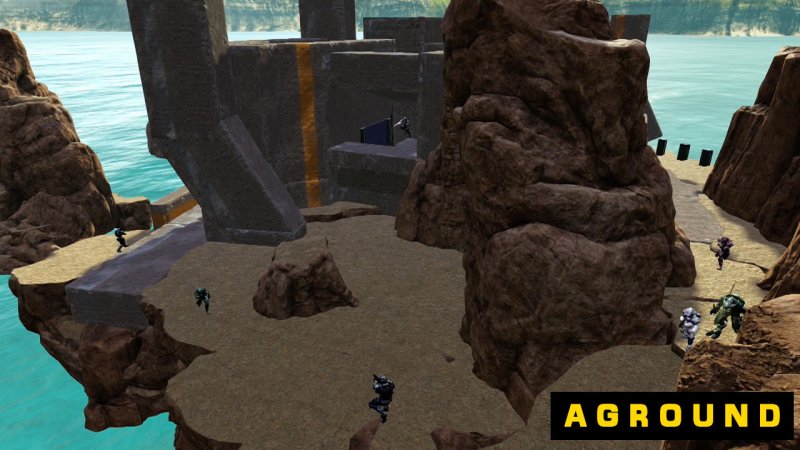
As you begin the map, you are placed in the back of a plateau with a small run-down recon outpost. As a human you are to make your way to the other side and begin surviving, although, the infected initials are waiting patiently in your survival area to catch any players not paying enough attention.
This stage is designed on a 3 path system. The left, middle, and right. This means that there will be 3 pathways that lead to the survivor’s holdout. This places the humans to break into groups themselves and watch these locations to ensure that their team can move on with the least amount of casualties.
This system has shown effective for the infected to grab choice kills when a human player count is not defending properly. Also, it allows the infected to not feel like all they are throwing themselves towards the humans hoping for a kill.
Weapons of Choice on stage 1
The first stage is home to a specific set of weapons to holdout with. The stage does not include very powerful weaponry as it would allow the survival of humans to be too easy.
First, the assault rifle, the assault rifle is considered to be the power weapon of the first stage as is can claim more range to effectively kill the infected players. There are 2 on this stage, so grab them quickly.
This stage also brings “dual magnums”, this is effective at close range to kill any approaching infected that may get the lunge at you, this is a much needed pickup.
As the timer allows the bridge to spawn you and your team now need to move as a group to the second stage. You move through a thin set of rock 1 by 1. This transition can be very helpful for precious seconds of separation of the infected if played smart, or can be the demise of your survival run. Various weapons are laid out to grab and go, also a very important Battle Rifle. (Words of advice have the BR player stay in back to pick off the invading infected, but save that ammo for the second stage.)
Stage two, the Cave
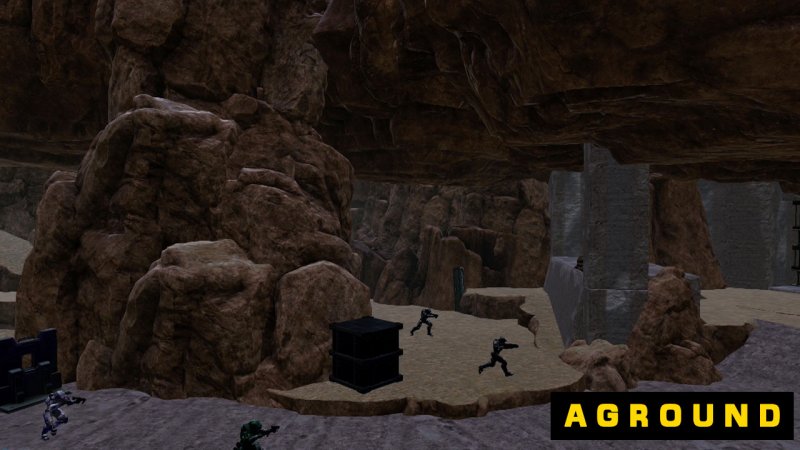
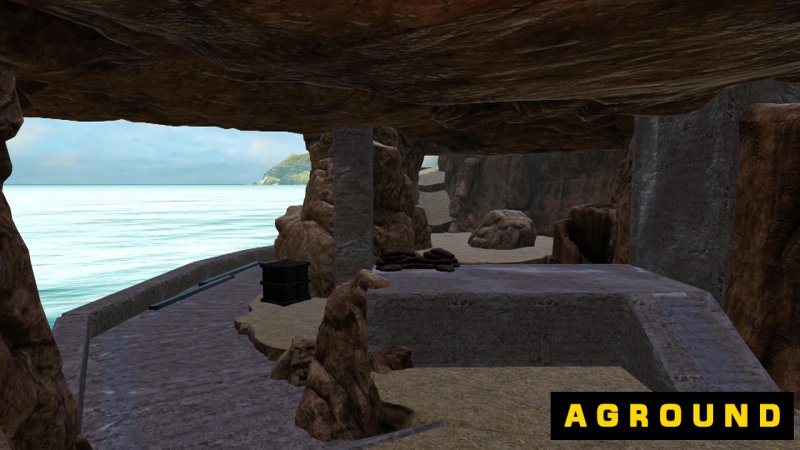
You are now entering the second stage, the cave. The cave aesthetically places you in the front defenses of your small base of commands; hold out for the time given, the gate opens, then fall back to be reinforced. This stage is designed for a 2 path system; it gets more up close and personal. The locations of survival force the humans to split into 2 groups, one on top of a platform overlooking central area, and the group set the left to stop the infected forced left from group 1 and vice versa. This stage can end your campaign if you let too many infected get control or can be a breath of fresh air.
Weapons of choice for stage 2.
The weapons that are laid out in stage 2 are designed for close quarter combat. You will be given a resupply of SMG and AR ammo. You will also find 2x shotguns with limited ammo, but may not be best choice for one player to grab both shotguns. Also if you brought the BR with some extra ammo you will find it very useful when placing shots at the approaching infected.
As the gate opens, make a call out to your teammates and run!! You are now making your way to the base. However, be weary of what is behind you, with the transitions between stages you as a player get the feeling and the fact of a hoard of infected trailing you.
Stage 3, the Base of Commands
As you make your way into the structure you take advantage of positions to slow or kill some infected. The stage is designed to allow the humans to play the positions periodically before overrun. Don’t allow the infected to automatically win the positions by you falling back. Take advantage of the stairs or balcony.
This stage is designed for the group to play in a single area, but the flow of infected rises. It is important for the infected to play as a hoard to gain ground, not single file. This allows the tempo of the map to shift into the favor of the infected and places more pressure on the humans for any slip. The base is laid out to allow humans control of the main room for duration of stage, but do have a fall back location outside, if need be. However, doing so, when the bridge opens for progression, these players must now push up and gain control before moving on. One thing to note is that Stage 3 is the most intense part of the map as humans get the feeling that slaughtering 1 infected only brings 2 more.
Stage 3 Weapons of Choice.
As you may have noticed, yes, this stage gets a rocket, a very important tool to ensure survival of this stage. A must have to clear the hoard of infected as they follow the humans after the gate opens to give some breathing room and for any other clumps of infected that may arise. Some ammo resupply of SMG and AR again. Lastly, a fall back shotgun to grab, very useful when rockets are used up.
Stage 4. The cove.
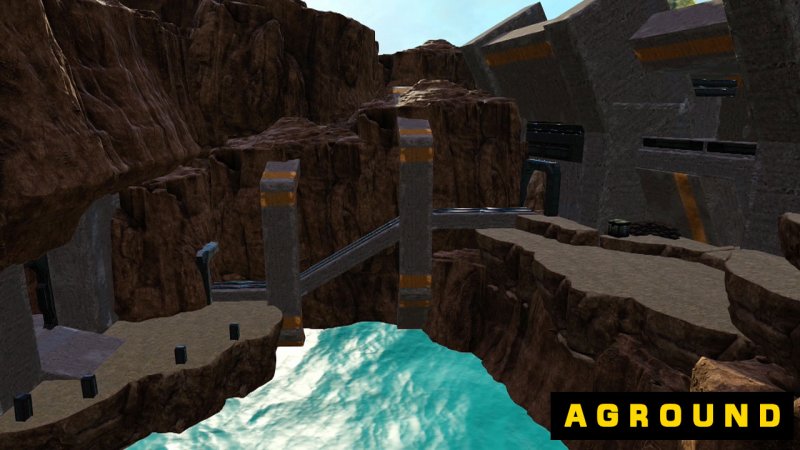
As the bridge appears, you press up with the remaining survivors looking for the safety down in the cove. This stage aesthetically brings the map back to beginning as you can see the recon outpost.
The stage is also built in a way to make the humans see the approaches of the infected. This allows a bit of knowledge and communication between the survivors to make their next move.
The cove is built on a 2 path system. This allows the infected to choose the path down the cliff side on the right, with rock pillar as cover, or to take the quick, but open path the get the jump on the humans on the left.
The stage is also designed for a wave system for the infected. No new teleporters become present. Infected must stack up and take the paths and gain more and more ground to overthrow the humans. However, this also kills time on the clock for the humans benefit. If the survivors do manage to survive the wave of infected this gives them time to regroup themselves, and get ready for the next wave. A good finale to the map.
Weapon of Choice, Stage 4
This stage hosts a few final weapons for the survival of the humans. There is a choice weapon of a BR to take down the remaining infected at a longer range. The shotgun is a must have when the BR fails to pick off the invading infected.
Aground, is a very immersive map that keeps the humans on their toes either at the holdout locations or on the movement between stages. The aesthetic value will keep you wondering what will be next. Lastly, the replay value on the map will want you to keep playing the map over and over when in a lobby. With this being said only the best humans will be able to survive the round, will you and your team be able to? Give it a download and see for yourself.
The video is linked to AbleSir Thomas and I's youtube channel. Here's a link if your interested in checking it out.

Created by: Auxi Klutch
Gametype: Parasite x21
Aground is a Halo 2 Anniversary Linear infection map shown on the canvas of Awash. This spectacle of map is home to jaw dropping aesthetics as you and your team of survivors make their way through the coastal ridgeline. The aesthetics don’t end there as you also move past a decommissioned UNSC recon outpost, then through a small defensive cave to ensure protection for the small base of operations located atop the ridge. Lastly, with the remaining survivors in your force, you make your last efforts to survive in a broken down cove.
Now, some quick facts you need to know about the map.
- The map is linear infection, or a progression map.
- The best game type to use is Parasite x21.
- Best player count is 10-16
- Needs teamwork to progress, not a solo effort.
As you begin the map, you are placed in the back of a plateau with a small run-down recon outpost. As a human you are to make your way to the other side and begin surviving, although, the infected initials are waiting patiently in your survival area to catch any players not paying enough attention.
This stage is designed on a 3 path system. The left, middle, and right. This means that there will be 3 pathways that lead to the survivor’s holdout. This places the humans to break into groups themselves and watch these locations to ensure that their team can move on with the least amount of casualties.
This system has shown effective for the infected to grab choice kills when a human player count is not defending properly. Also, it allows the infected to not feel like all they are throwing themselves towards the humans hoping for a kill.
Weapons of Choice on stage 1
The first stage is home to a specific set of weapons to holdout with. The stage does not include very powerful weaponry as it would allow the survival of humans to be too easy.
First, the assault rifle, the assault rifle is considered to be the power weapon of the first stage as is can claim more range to effectively kill the infected players. There are 2 on this stage, so grab them quickly.
This stage also brings “dual magnums”, this is effective at close range to kill any approaching infected that may get the lunge at you, this is a much needed pickup.
As the timer allows the bridge to spawn you and your team now need to move as a group to the second stage. You move through a thin set of rock 1 by 1. This transition can be very helpful for precious seconds of separation of the infected if played smart, or can be the demise of your survival run. Various weapons are laid out to grab and go, also a very important Battle Rifle. (Words of advice have the BR player stay in back to pick off the invading infected, but save that ammo for the second stage.)
Stage two, the Cave
You are now entering the second stage, the cave. The cave aesthetically places you in the front defenses of your small base of commands; hold out for the time given, the gate opens, then fall back to be reinforced. This stage is designed for a 2 path system; it gets more up close and personal. The locations of survival force the humans to split into 2 groups, one on top of a platform overlooking central area, and the group set the left to stop the infected forced left from group 1 and vice versa. This stage can end your campaign if you let too many infected get control or can be a breath of fresh air.
Weapons of choice for stage 2.
The weapons that are laid out in stage 2 are designed for close quarter combat. You will be given a resupply of SMG and AR ammo. You will also find 2x shotguns with limited ammo, but may not be best choice for one player to grab both shotguns. Also if you brought the BR with some extra ammo you will find it very useful when placing shots at the approaching infected.
As the gate opens, make a call out to your teammates and run!! You are now making your way to the base. However, be weary of what is behind you, with the transitions between stages you as a player get the feeling and the fact of a hoard of infected trailing you.
Stage 3, the Base of Commands
As you make your way into the structure you take advantage of positions to slow or kill some infected. The stage is designed to allow the humans to play the positions periodically before overrun. Don’t allow the infected to automatically win the positions by you falling back. Take advantage of the stairs or balcony.
This stage is designed for the group to play in a single area, but the flow of infected rises. It is important for the infected to play as a hoard to gain ground, not single file. This allows the tempo of the map to shift into the favor of the infected and places more pressure on the humans for any slip. The base is laid out to allow humans control of the main room for duration of stage, but do have a fall back location outside, if need be. However, doing so, when the bridge opens for progression, these players must now push up and gain control before moving on. One thing to note is that Stage 3 is the most intense part of the map as humans get the feeling that slaughtering 1 infected only brings 2 more.
Stage 3 Weapons of Choice.
As you may have noticed, yes, this stage gets a rocket, a very important tool to ensure survival of this stage. A must have to clear the hoard of infected as they follow the humans after the gate opens to give some breathing room and for any other clumps of infected that may arise. Some ammo resupply of SMG and AR again. Lastly, a fall back shotgun to grab, very useful when rockets are used up.
Stage 4. The cove.
As the bridge appears, you press up with the remaining survivors looking for the safety down in the cove. This stage aesthetically brings the map back to beginning as you can see the recon outpost.
The stage is also built in a way to make the humans see the approaches of the infected. This allows a bit of knowledge and communication between the survivors to make their next move.
The cove is built on a 2 path system. This allows the infected to choose the path down the cliff side on the right, with rock pillar as cover, or to take the quick, but open path the get the jump on the humans on the left.
The stage is also designed for a wave system for the infected. No new teleporters become present. Infected must stack up and take the paths and gain more and more ground to overthrow the humans. However, this also kills time on the clock for the humans benefit. If the survivors do manage to survive the wave of infected this gives them time to regroup themselves, and get ready for the next wave. A good finale to the map.
Weapon of Choice, Stage 4
This stage hosts a few final weapons for the survival of the humans. There is a choice weapon of a BR to take down the remaining infected at a longer range. The shotgun is a must have when the BR fails to pick off the invading infected.
Aground, is a very immersive map that keeps the humans on their toes either at the holdout locations or on the movement between stages. The aesthetic value will keep you wondering what will be next. Lastly, the replay value on the map will want you to keep playing the map over and over when in a lobby. With this being said only the best humans will be able to survive the round, will you and your team be able to? Give it a download and see for yourself.
The video is linked to AbleSir Thomas and I's youtube channel. Here's a link if your interested in checking it out.
